

Installation
Run the setup command to configure Context7 for Cursor:Setting Up Rules
Withctx7 setup, a skill is installed that triggers Context7 automatically. If you prefer to use a rule instead, add one in Cursor.
- Cursor Settings
- .cursorrules File
1
Open Settings
Go to 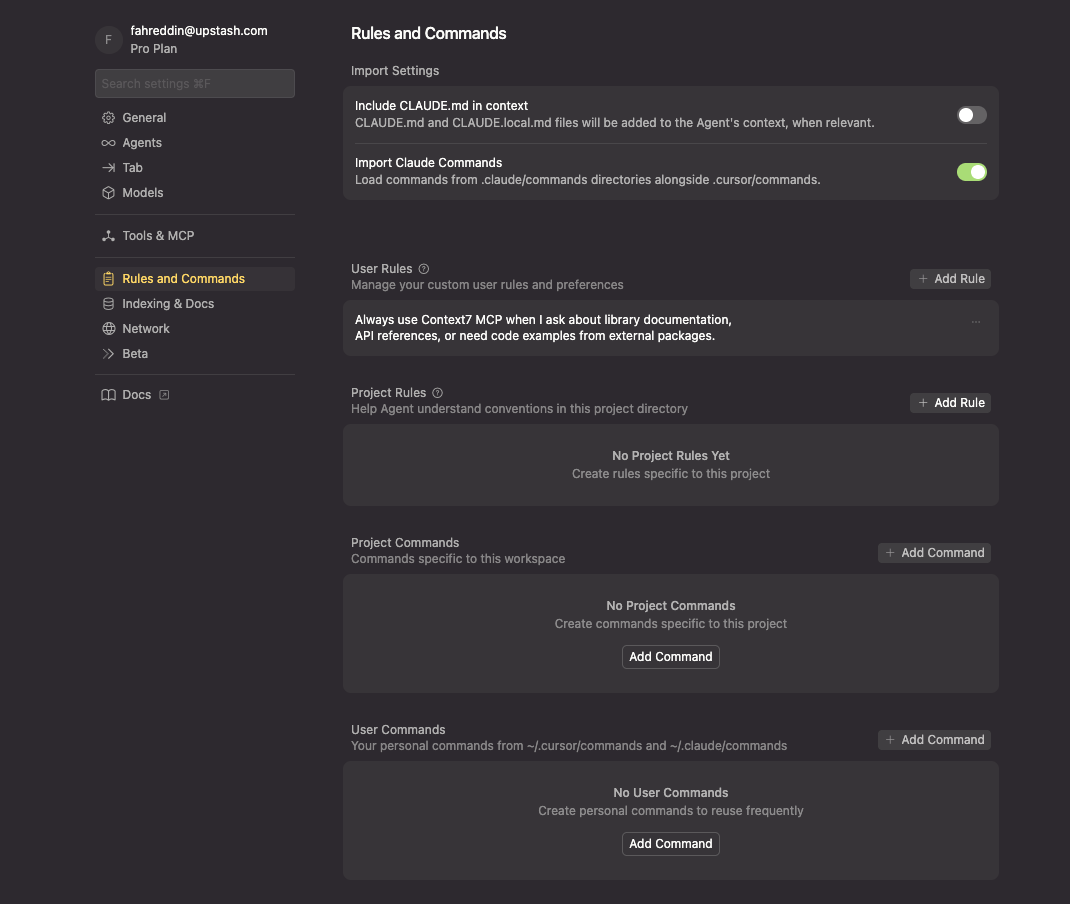
Cursor → Settings... → Cursor Settings → Rules and Commands. You can also press Cmd+Shift+P (or Ctrl+Shift+P on Windows/Linux) and type “Cursor Settings”.2
Add the Rule
Using Context7
Add “use context7” to your prompts to fetch current documentation:Cursor Cloud Agents
Cursor Cloud Agents use MCP servers configured for the cloud agent, not the MCP configuration from your local Cursor installation. If Context7 works in the IDE but a Cloud Agent reports an anonymous quota, add an authenticated HTTP server in the Cloud Agent UI.The MCP connection is independent of the model selected for the agent. You can
use the same Context7 server with any model available in Cursor Cloud Agents.
Before you begin
Create an API key in the Context7 dashboard. Keep the key available while you complete the steps below, but do not commit it to your repository or include it in screenshots.Add Context7 to Cursor Cloud Agents
1
Open a Cloud Agent
Go to cursor.com/agents and start a new agent. If you start the agent from the Cursor desktop app, select Cloud from the environment menu below the agent input.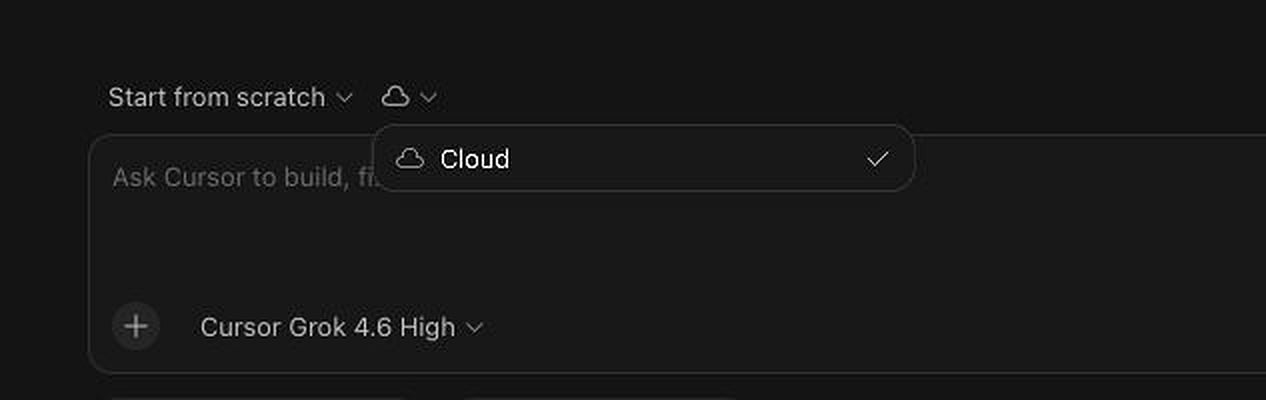
2
Open the MCP server menu
Select + (Add context and tools), then MCP Servers and Add MCP.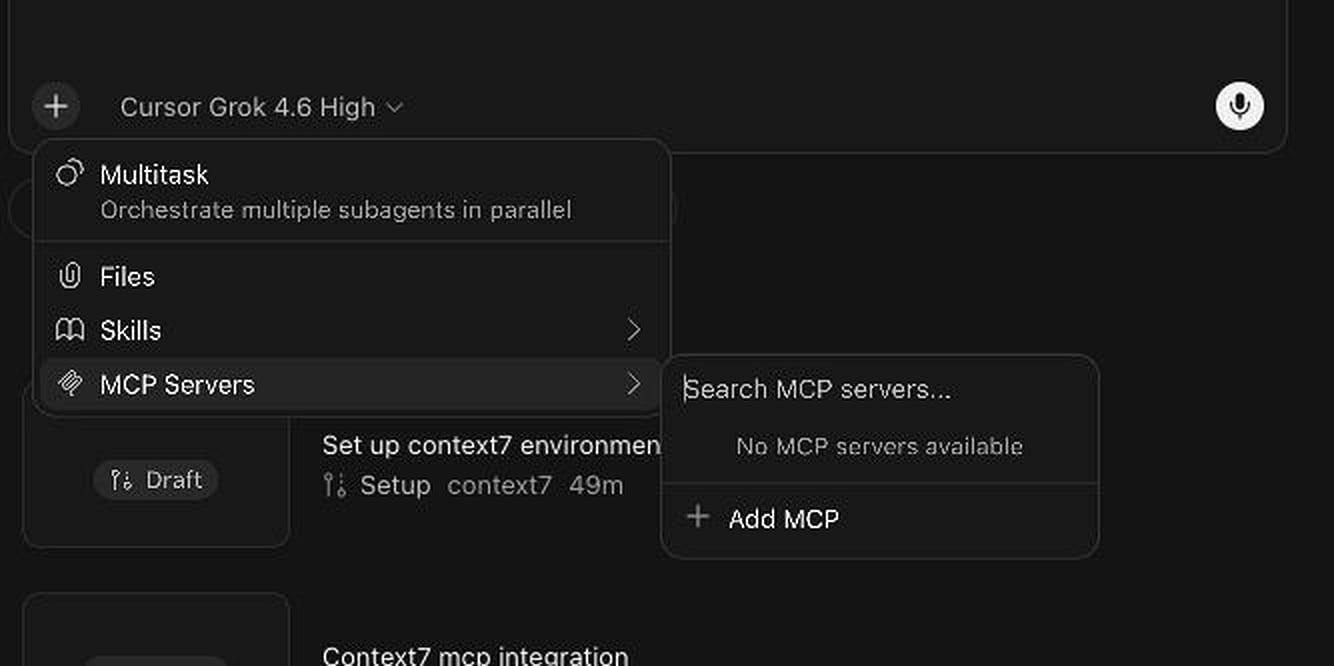
3
Choose Custom MCP
In the MCP browser, select Custom MCP.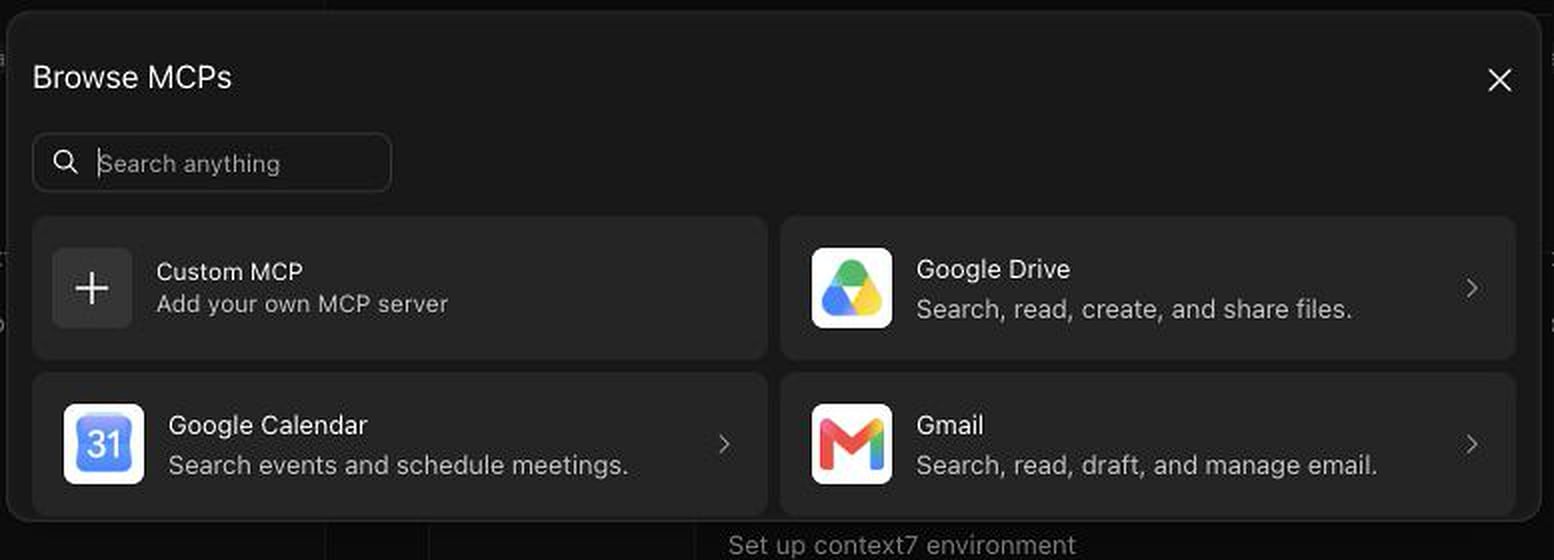
4
Configure the authenticated Context7 server
Enter the following values: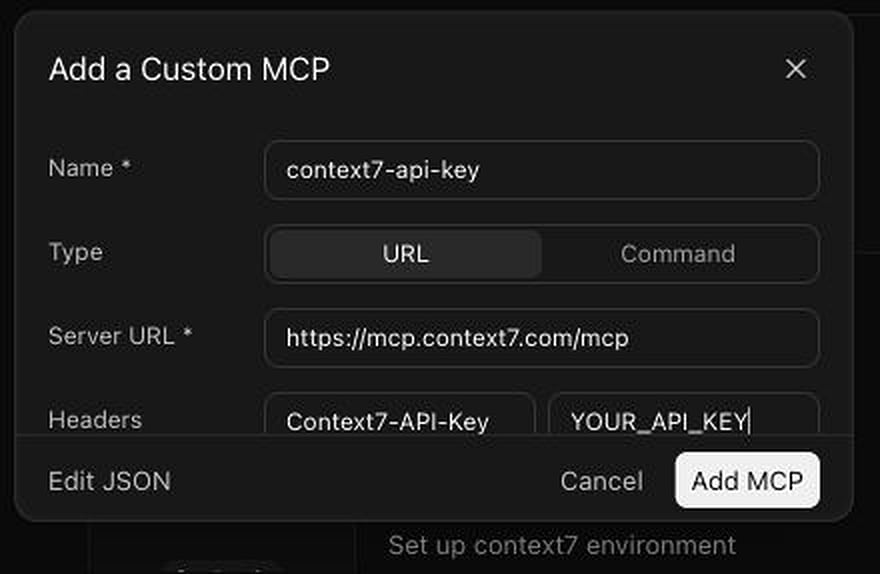
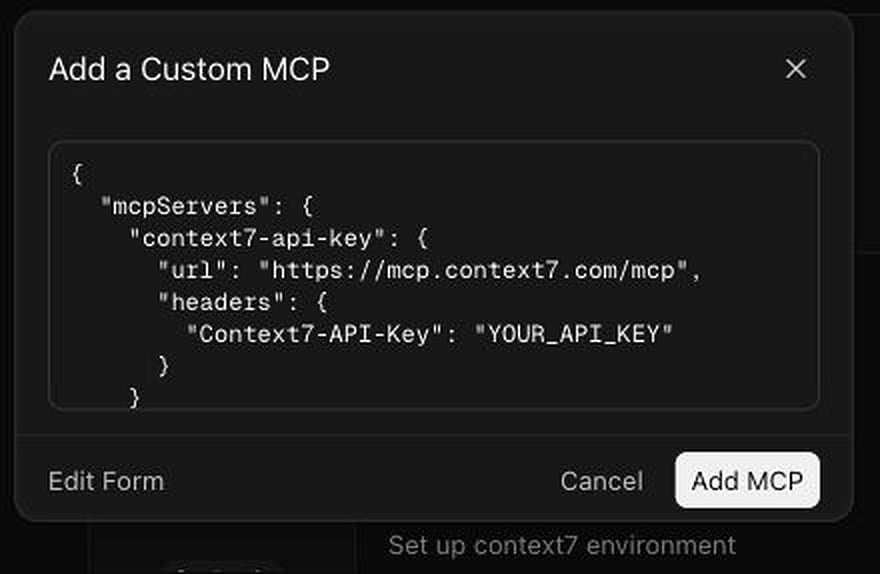
The distinct
context7-api-key name avoids a namespace collision when the OAuth-based Context7 plugin is also installed. If you do not use the plugin, you can name the server context7.Context7 also accepts Authorization: Bearer YOUR_API_KEY, as shown in the general MCP client examples. This guide uses Context7-API-Key because that configuration was verified with Cursor Cloud Agents and keeps API-key authentication separate from the plugin’s OAuth connection.5
Add and enable the server
Select Add MCP. Before starting the run, open + → MCP Servers again and confirm that
context7-api-key is enabled.A green status confirms that Cursor initialized the MCP server. It does not by itself prove that the request was authenticated.6
Verify authenticated access
Start a new Cloud Agent run and test both tools:To verify authentication conclusively, query a private library that belongs to the Context7 account associated with the API key:If the private library can be read, the Cloud Agent is using the API key. If the agent reports Monthly quota exceeded even though the key has quota, the request is reaching Context7 anonymously; recheck the header name and start a new run after saving the MCP server.After the API-key header is applied, the same Cloud Agent should be able to resolve a library and return documentation without the anonymous quota error: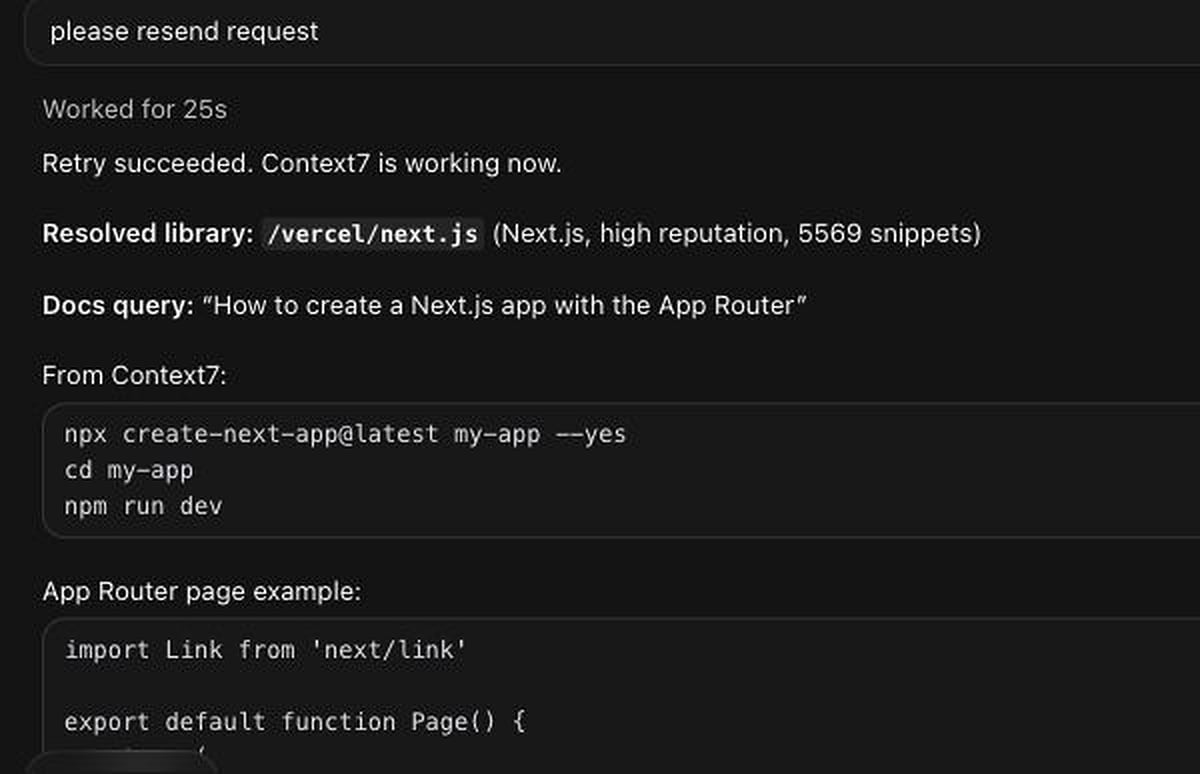
OAuth and the Context7 Cursor plugin
The Context7 plugin uses the OAuth endpoint and does not currently provide a field for an API key. Cursor supports OAuth for Cloud MCP servers, but installing or enabling the plugin does not guarantee that its OAuth sign-in flow has completed.- Use the plugin when you want OAuth and complete the sign-in prompt for the same Cursor account that launches the Cloud Agent.
- Use the custom HTTP setup above when you need explicit API-key authentication, including access to private Context7 libraries.
Troubleshooting
Monthly quota exceeded
Monthly quota exceeded
The request is usually anonymous. Confirm that the custom server URL is
https://mcp.context7.com/mcp, the header is named Context7-API-Key, and the saved value is the current API key. Then enable the server and start a new Cloud Agent run.Context7 tools or namespace are missing
Context7 tools or namespace are missing
Open + → MCP Servers before starting the run and enable
context7-api-key. If the run was already started, enable the server and create a new run so Cursor can expose its tools to the agent.A repository mcp.json or symlink does not work in Cloud Agents
A repository mcp.json or symlink does not work in Cloud Agents
Configure the personal HTTP MCP server from the Cloud Agent UI. A local
~/.cursor/mcp.json, a repository .cursor/mcp.json, or a symlink created inside the Cloud Agent VM does not configure the backend-proxied personal HTTP connection.Tips
Project vs Global Config
Project vs Global Config
Use global config (
~/.cursor/mcp.json) when:- You want Context7 available in all projects
- You’re using a personal API key
.cursor/mcp.json) when:- The project has specific Context7 requirements
- You want to share the setup with teammates
- Different projects need different API keys
Combining with Cursor Composer
Combining with Cursor Composer
Context7 works well with Cursor’s Composer feature. When you’re building something that involves external libraries:
- Start with a prompt that mentions the libraries you need
- Context7 fetches the relevant docs
- Composer uses those docs to generate accurate code
Getting Better Results
Getting Better Results
- Be specific about what you’re trying to do, not just which library
- Mention versions when they matter
- If the first result isn’t right, ask for a different part of the docs